
The hidden Rebel base on Hoth has been discovered by the Imperials, and it's up to you to help or hinder the Alliance as they make their escape in Chapter 11: The Battle of Echo Base! Join Darth Vader, Luke Skywalker, Han Solo, and other allies as you and your friends square off against the Rebellion or Empire.
Intrigued about these heroes of the Empire and Alliance? Break the ice and get to know more about these famous faces in the battle of Echo Base.

An Imperial Probe Droid gave the Empire their best lead in finding the hidden Rebel base in the Hoth system. When the Imperials came out of hyperspace too close to the system, the Rebels had time to detect the Empire's presence and activated an energy field strong enough to deflect bombardments from the Star Destroyers orbiting the planet. Darth Vader orders General Veers to launch a surface attack immediately.

 General Maximilian Veers is the commander of the Imperial ground troops racing to Echo Base. Veers personally supervises the advance of the Empire's All Terrain Armored Transports and the snowtrooper forces toward the shield generator on the surface of Hoth.

 Having learned of the existence of Luke Skywalker in the Rebellion, Darth Vader is aggressively scouring the galaxy for the hidden Alliance base. When the probe droid returned blurry images from the surface of Hoth, Darth Vader ordered the Star Destroyers to the planet without hesitation. Darth Vader will stop at nothing to track down and capture the leaders of the Rebel Alliance.

The Rebellion chose the distant planet of Hoth to stay far away from the prying eyes of the Empire, but their hidden base has been discovered. The Rebellion forces must evacuate Echo Base and these Rebel leaders are just some of the difference makers in this landmark battle.

 General Carlist Rieekan of Alderaan is the commander of all Alliance ground and fleet forces in the Hoth system.
During the battle of Echo Base, General Rieekan orders the evacuation and directs all defense, counterattack, and evacuation through subordinate commanders Princess Leia and Luke Skywalker.

 Leia Organa of Alderaan once served in the Galactic Senate, but now uses her natural leadership skills in the uprising against the Empire.
Princess Leia works with General Rieekan at the battle of Echo Base by coordinating the Rebel fighter pilots who will protect the escaping transport ships.

 Young Luke Skywalker is an integral part of the Rebel Alliance and an accomplished pilot. Luke is recovering from a vicious wampa attack when the order to evacuate Echo Base is given.
Commander Skywalker is the Rogue Leader of the snowspeeder fleet charged with getting the escaping transports to safety. The snowspeeders must divert the AT-AT's attention long enough for the Rebellion's ships to reach the stars.

 Han Solo and Chewbacca are still with the Rebel Alliance long after the destruction of the Death Star, assisting with establishment of the hidden base on Hoth. However, a death mark looms over Han's head, and he is eager to pay the price on his head.
The Imperial attack is launched against Echo Base before Han and Chewie leave to meet Jabba the Hutt, and the smuggler and his co-pilot must get Princess Leia safely off the icy planet before it is too late.

 Dack Ralter of Kalist VI is a hotshot tailgunner assigned to Luke Skywalker's snowspeeder. This fresh-faced young gunner feels ready to take on the whole Empire by himself.
These are just some of the major players in the battle you might encounter during the skirmish on the icy fields of Hoth. You and your friends have an important role to play alongside these heroes in Chapter 11: The Battle of Echo Base.

Become a part of a landmark battle in Chapter 11: The Battle of Echo Base! Fight for the Galactic Empire or the Rebel Alliance on the icy fields of Hoth in a Star Wars Galaxies experience unlike any other. This breathtaking heroic encounter puts you at the controls of a Rebel snowspeeder or an Imperial AT-ST as you and your friends jump into the fray at Echo Base.

 Those sympathetic to the Rebel Alliance or Galactic Empire begin their journey to Hoth at the Adventurers' Guildhall in Aurilia.
Only those who have chosen a side in the Galactic Civil War can take part in the battle, and all group members must be the same faction in order to enter the encounter together.
The Empire's ground forces at the battle of Echo Base are commanded by General Maximilian Veers. If you and your allies are Imperial, in this encounter you will support Veers with his task to kill or capture as many of the Rebel personnel as possible before they escape. In addition, the Imperials must act quickly to cut off the supplies of goods and resources to the evacuating Rebel forces.
If you and your group are part of the Rebel Alliance, in this encounter you will assist General Carlist Rieekan and the Rebels stationed at Echo Base with escaping the Imperial onslaught. The ultimate goal of the Rebel Alliance is to evacuate Echo Base with as much manpower and material as can reasonably be preserved.
Depending on where your allegiance lies, you and your fellow adventurers must complete specific goals in this heroic encounter. Each stage of the battle has its own objectives and goals, so keep an eye on both your comm window and the Quest Journal for important updates! The major players of the battle direct you and your team to where you are needed in the fight.
Once you and your allies are ready to fight, the battle begins on the north field.

The north field is the primary battle line. The Empire is making their move toward the shield generator and the Rebels are trying their utmost to buy time for those still in Echo Base.

The operational generator keeps the shield at full strength and the ion cannon on the field provides cover for the escaping transports. Once the generator is lost, the north field will quickly follow as the area will be overwhelmed with Imperial forces.

Imperial forces consist of AT-ATs and AT-STs supported by the snowtrooper light infantry. You and your group can commandeer the AT-STs to take on the Rebellion's troops on the ground. Use the radial menu on the AT-ST and choose Enter/Exit Vehicle to escort the AT-ATs.

Accompany and protect the AT-ATs by destroying Alliance snowspeeders and fixed gun emplacements scattered throughout the north field. It's up to you and your allies to get the AT-ATs to optimum firing distance on the shield generator and lose as few Imperial forces as possible to the Rebel forces.

A light infantry, fixed turret emplacements, and snowspeeders comprise the Rebel forces defending Echo Base. Ground infantry can do little damage to an AT-AT, so your group's primary concern for the north field is escorting the sapper units into proper position.
Rebel forces can engage the AT-ATs by piloting a snowspeeder on the icy field. Use the radial menu to enter a snowspeeder on the field outside of the Echo Base hangar.

Snowspeeders are exceedingly important to make a direct impact against AT-ATs; these quick fighters inflict more damage than troops on the ground and need to be protected. Defend the shield generator and take out as many AT-ATs as you can to buy the escaping transports as much time as possible.

Echo Base is a major Rebel stronghold, so there is a significant amount of material vital to the survival of the Alliance located inside the base.

Darth Vader and the Empire are focused on capturing the leaders of the Rebellion as well as any vital information inside. Rebels must concentrate on evading the Imperial attack while continuing to evacuate all personnel with as many supplies as possible.
With the primary shield generator destroyed, reinforcements are arriving quickly from the Star Destroyers in orbit above. Assist snowtroopers, grenadiers, and squad leaders inside the mazelike caverns of Echo Base to secure the Rebel's supplies in the base.

Infiltrate and disable the command center inside the base to deal a major blow to the Rebellion's evacuation efforts.
Every transport that can get away is a point of victory for the Rebel Alliance, and the more stocked a transport, the better off they will be to continue the fight in the future.

Assist the Rebellion by evacuating as much of the base personnel as possible.

One of the most vital areas of Echo Base is the evacuation point, a field where the transports and their escorts are taking off to escape the wrath of the Empire. Most of the non-combat personnel have already departed from Hoth, leaving a large concentration of Rebel forces still on the base. Failing all else, this is the last line of defense for the Rebels and the ultimate victory for the Imperials.
This is your last chance to wreak havoc on the retreating Alliance forces. Imperial snowtroopers may join you in the assault or remain inside the base fighting pockets of resistance.

Concentrate your firepower on the remaining transports and caches of supplies and equipment to make a dent in the Rebels' resources.
The evacuation point is where the escaping forces of Echo Base make their last stand. Protect the remaining transports at all cost and complete the evacuation of Rebel forces from Hoth. If a transport is destroyed, Rebel personnel assigned to that transport will surrender.
Make a stand on the north field, destroy the shield generator protecting Echo Base, protect Rebel transports as they escape, and more – all in the newest heroic encounter in Chapter 11!

"Sir?"
Captain Andal Sait continued to fix his gaze on the glittering stars shining through the window. Lieutenant Kenkirk glanced around the bridge and whispered urgently, "Sir!"
Sait closed his eyes and took a slow, deep breath. Months of careful planning had brought him to this moment. He was ready.
He opened his eyes, turned to Kenkirk, and said simply, "Begin."
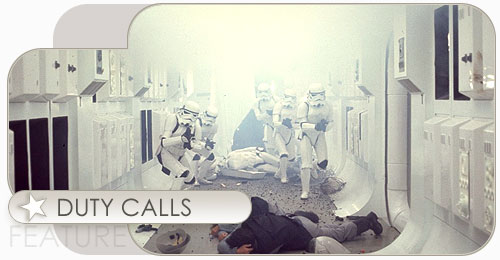
Chief Olum heard the klaxons echoing through the ship and knew that the traitorous captain had put his plan into motion. The stormtroopers could be heard thundering down the hallways, carrying out Sait's orders to remove all crew members who were not loyal to him. Olum didn't have much time.

When Kenkirk had approached Olum the day before to test his allegiance, he was wise enough to keep his mouth shut. The Star Destroyer was in deep space, far from the eyes of the Empire, and the chief engineer was well aware that Sait had an entire legion of stormtroopers at his command.
"The captain has decided to join the Rebel Alliance?" Olum had asked the lieutenant.
"Don't be foolish," snapped Kenkirk. "The Empire will squash that little uprising before too long. This isn't about politics."
"Then what is it about?"

Kenkirk grinned and said, "Money. Captain Sait has a contact in the Black Sun who is willing to take this ship off our hands for a good sum of credits. You'll make more than you would in a lifetime of service to the Empire. All you have to do is stay quiet and go along for the ride. A ship this size can't stay running without its chief engineer, so what do you say?"
Olum noticed Kenkirk's hand slowly moving toward a blaster concealed under his jacket, and said quickly, "Of course I'm in, if the payoff is as good as you say it will be."
Kenkirk's hand paused. "Excellent, the captain will be pleased. You will be rewarded for your loyalty, Chief."
Olum knew he had to get a message back to the Empire to inform them of the traitor's actions. He couldn't send a message through subspace without gaining the attention of Watch Captain Prat or the other officers loyal to Sait, so it had to be sent off the ship. The TIE fighter pilots were the only ones who might be able to escape.

The chief engineer was familiar with the Star Destroyer and its weaponry. Although the turbolasers packed a punch unlike any other in the galaxy, small ships were difficult to target. The TIE fighters should be able to weave through the crossfire and get within transmission range to contact the Empire. Anyone else monitoring subspace radio might also pick up the message about the rogue captain, but Olum had to take his chances.
Olum picked up his comlink and spoke into it. "TIE Hangar, this is Chief Olum, do you copy?"

"Yes, sir," came the immediate answer.
"I am sending a message to your terminal now." Olum said. "Launch all TIE fighters in the hangar bay and relay the transmission to the fleet immediately."
"Yes, sir!"
Olum quickly started making adjustments to his terminal. The TIE fighters might be able to escape the lasers, but to have a fighting chance, the tractor beam had to be disabled. Thanks to the warning Kenkirk had given him, he was prepared.
"Captain! The TIE fighters have launched!" Kenkirk shouted frantically.
"Activate the tractor beam and pull those ships in." Sait ordered.
"I can't, sir." Kenkirk looked at the captain in desperation.

"Open fire." Sait pressed a button on his terminal. "Olum! Why aren't the tractor beams functioning?"
"Sir, it appears the power cells are inactive. One of the crew must have disabled them before the stormtroopers got to them." Chief Olum responded.
Sait paused. "One of the crew, is it? Well, no matter. Without hyperdrive, those ships won't get far." Sait turned his attention to Kenkirk. "Lieutenant, has the rest of the crew been captured?"
"Yes, sir, the stormtroopers have the crew secured."
"Excellent. Escort them into the escape pods and launch them into space. When you're done, take Olum to one of the holding cells. We need him alive to keep the ship running. Oh, and Commander Kenkirk?"
"Sir!" Kenkirk snapped to attention with a small smile.
"Send a message to Krix and inform him that Grand Admiral Sait has his merchandise ready. We'll meet him in Ord Mantell space. We might have some company on the way, so he best come prepared."
An Imperial captain has gone rogue and taken his Star Destroyer with him. A group of adventurers who want to take back the ship can recruit a pilot to smuggle them aboard. Your journey to the Star Destroyer begins in the Aurilia Adventurer's guildhall (You must complete one of these quests in order to start this dungeon instance):
Lost Star Destroyer quest given by Imperial investigator Major Appleton.
These quest give you access to the Blackguard (Imperial Star Destroyer), in order to get on it, you must hyperspace to Ord Mantell (Nova Orion), then fly up to the Blackguard (Imperial Star Destroyer) once you get close, target and go to the Blackguard Hanger Bay, once you are within 100m, type /conv and you can then enter the Blackguard (Imperial Star Destroyer) dungeon instance. You can take only those in your ship, so use a multi-player ship, an to avoid combat, its prob best to use the Sorosuub Personal Luxary Yacht 3000.
Mobs Involved:
Krix Swiftshadow
a Blackguard Grenadier
Watch Captain Prat
Grand Admiral Sait
Star Destroyer Defeated 0/10
You must deefat the Star Destroyer ten times to complete this collection.
Rewards:
0 credits
0 quest xp
You will receive ALL of these items:
Badge: Imperial Star Destroyer
Skill Mod: +10 Opponent Block Reduction
Notes:
Opponent Block Reduction increased by 1 each time Star Destroyer is defeated.
Badge Received: Imperial Star Destroyer
Bio Badge Received: Imperial Star Destroyer
1st Phase: 1-2 Jedis tank Krix, the rest starts a coordinated killing of the Grenadier Stormtroopers left to right, avoid the grenades! If you die, do not clone until everyone is dead or wait for a rez from a medic. Jedis should keep Krix busy, Medics keep healing! Always keep moving once the grenadiers are dead, the group concentrates fire on Krix, but avoid the fire patches.
2nd Phase: Krix removes the walls. Start killing the Dark Troopers AS QUICKLY AS POSSIBLE, let no one escape. STAY CLOSE TOGETHER! Medics: Heal don't tank! After a moment the stormtrooper squadleader will spawn. Kill him and it will stop the respawning of Dark Troopers! (Note: Use the right way and you'll find an office with a statue)
3rd Phase: Once the Stormtrooper squadleader is dead, the gate will open. Kill the patrolling stormtrooper and Dark Trooper will spawn. Stay grouped and kill ALL of them as quick as you can. (Note: Use left way, take the elevator and you'll see a statue on the left side of the room)
4th Phase: Head to your right and ask the officer to remove the walls. In the left path are stormtrooper grenadiers. Pull them to the big room and kill them there until Prat & two droids arrive. A jedi should pull the droids one by one and if we have two medics, they should apply Stasis Field to Prat. All must target the SAME droid, destroying one at a time, THEN kill Prat. Ask the head technician to repair the elevator.
5th Phase: Use the elevator in the big room and stay where you arrived. There are blacksun boarders (500k life & heavy specials), you must kill them before you can move to the next room. Medics: Stay in the back. Jedi: Pull & kill the blacksun boarders one by one in the room. Move to the next room and kill the engineer and blacksun boarders spawn. Again the Jedis should pull the blacksun boarder to the room. Kill the engineer walking around in the next room, once killed 3 blacksun boarders spawn. Jedi pull strategy! If you aren't in the big room yet go in and Jedi should pull the boarder. Next blacksun is an engineer, move to the last room and start killing either the bottom or top boarders. Once everything is done the head technician will come to fix the gate lock, head back to the elevator.
6th Phase: The head technician will open the next gate. Start fighting Commander Kirkum, who uses heavy ordnance and an orbital strike. Medics: Stay in safe distance constantly healing the group. Jedi: Hold Kirkum at the end of the hallway. (Note: There's a statue in the 2nd left room.)
7th Phase: Sait doesn't put up much of a fight, but stay sharp, he will be using officer abilites.
=======================================================================================
EVERYONE GETS: A blacksun token of heroism & a badge!
RANDOM LOOT:
Schematic for Acidic Paragon Vibro Axe [One-time use]
Schematic for Whistler Carbine [One-time use]
Schematic for P-8 Lamprey Pistol [One-time use]
Schematic for Ace Field Pack [One-time use]
=======================================================================================
The Corellian Corvette
The Corellian Corvette is our first "space-based" adventure and a familiar Star Wars setting with nine separate quests. Glistening white hallways and dark access ways crisscross the decks of the famed Rebel blockade runner from A New Hope. Players must complete one of nine possible missions to receive a shuttle ticket to the Corvette. There are three missions for Rebels, three missions for Imperials and three missions for neutral players. Depending on which quest players take will depend on which objectives must be achieved while on the Corvette.
One of the most unique things about the Corellian Corvette is that it is "instanced". This means that your group and your group alone moves through it. We plan to make many of our future adventures instanced so that players can maintain immersion in their adventure.


A single player may choose to go to the Corvette. Be warned though, there are many strong opponents to defeat and the objectives of the quest must be completed in time. Players who are unable to complete the quest in time won't get the badge or the rewards, so be prepared...and bring friends.


Rebel Rescue Mission
CorSec officers have arrested a Rebel under the suspicion of terrorist activities. The Empire has gone out of their way to implicate him and plant false evidence of his treason and guilt. The Alliance's only hope is to rescue him before the CorSec ship reaches its destination, Dathomir, where he will be tried and placed in the Imperial Prison there. The ship is almost entirely manned by the Imperials at this point, since they've taken command of the ship as a prisoner transport. Only a small group of CorSec officers (all loyal to the Emperor) remain on board.
Adar Tallon is concerned for the safety of the Rebel, since he's a well-liked, highly-decorated Alliance pilot. The Empire used CorSec to arrest him under false pretenses and he wants to get him back before they do something horrible to him in the Dathomir Prison. The problem is, Tallon needs the security override codes in order to be able to get close to the CorSec ship. He can't get them from CorSec because they're still convinced the man actually is a criminal. CorSec has been somewhat sympathetic to the Alliance so Tallon doesn't want to directly involve them in either clandestine operations or a direct attack. He's looking for some Rebel help...
Rebel Assassin Mission
A particularly ruthless Imperial commander has been on the Alliance's list of priorities since almost the day he was promoted. He's infamous within the Alliance for butchering anyone and everyone in his way, and for using the most extreme torture methods available. Rumor has it he was directly involved in the creation of the ITO prototypes. Now he's gone a step further; he's actually overtaken a Rebel blockade runner, eliminated the entire crew, and plans to crash the ship into a suspected Rebel city on the surface of Tralus.
Pashna Starkiller has finally broken down and realized that the only way to deal with someone as ruthless as the Imperial is to assassinate him. Pashna isn't happy about this decision, but given the circumstances it seems to be the best course of action. Of course, the primary objective of the Rebels should be stopping the blockade runner before it crashes into Tralus, but as a secondary objective, the assassination of the Imperial should be looked into.
Rebel Destroy Mission
The Imperials have struck upon a brilliant political maneuver. They've stolen a Rebel blockade runner, filled it with explosives, and are planning to send it hurtling into Centerpoint Station near Corellia. The plan being, make the Rebels look both foolish and dangerous at the same time. They plan to use this maneuver to force the hands of Rebel sympathizers and to garner political support in the Press. Rebel spies found out about the operation just as it started, and now it's time to do something about it quickly.
Master Sergeant Crowley is in charge of this operation, and she's definitely the woman for the job. She knows it will take some time for the Empire to rig the ship, and to acquire all the explosives they need and have them transported. She needs to use the time wisely though, in order to get her agents to the Corvette before anything goes wrong.


Imperial Rescue Mission
There are some scientists who agree whole-heartedly with the Empire's xenophobic views of the universe. One of these is Dr. Bledsoe, an Imperial expert in the field of disease and medicine. Dr. Bledsoe has been abducted by a group of Alliance terrorists, and is being whisked away for questioning at one of the Rebel insurgence camps. Someone must rescue him before it's too late.
An Imperial colonel who is on the verge of retirement heads the rescue operations. He feels it is his duty to make sure all Imperial hostages are freed before he gives up his post. The Colonel needs a group of ragtag Imperial supporters to board the Rebel blockade runner and make sure that Dr. Bledsoe is freed before any harm befalls him. Who knows what those ruthless Rebels will do to a poor scientist who can't even defend himself properly?
Imperial Assassin Mission
Imperials will be sent to the Corvette to eliminate a Rebel officer of high rank. Assassinating the Rebel will be a difficult task because the Corvette will be well guarded and filled with traps and locked doors.
Lt. Sabol, an Imperial Officer who sees no reason Rebel officers should be allowed to live. Women are a rarity among Imperial officers, but she will be cold and ruthless as any male. She will not tolerate failure.
Her current problem is that she's in charge of gathering information for her superiors and her underlings have proven useless time and time again. What she needs is someone to steal Rebel documents for her.
Imperial Destroy Mission
This ship is on its way to deliver a payload of weapons to a group of Rebels preparing to slaughter outnumbered Imperial soldiers. The Empire would like to simply vaporize it with a nearby Star Destroyer, but fear the political ramifications since the Corvette has been tagged as a medical frigate. Therefore, the dirty work will have to be done from the inside, so as to allay suspicion.
A brash young Imperial officer, who is ambitious and not afraid to show it, believes that he can use these destructive missions to further his political career. He won't like it if his agents fail. Before he can send them, though, he needs the destruct sequence for the ship. He doesn't have it handy, but has some ideas where he can get it. Once the player brings him the codes he will send them to the Corvette to do their job.


Neutral (Criminal) Rescue Mission
Jabba the Hutt is not happy. One of his top assassins has been captured on Corellia and will be transferred to the prison on Dathomir as soon as possible. Jabba wants this Trandoshan named S'lee rescued, if for no other reason then because he is worried that the man will trade secrets about Jabba's organization in order to lessen his sentence. Jabba has put one of his most trusted lieutenants on the case, a Zabrak known as Yondalla. She's a tough customer, and she needs some shady characters to find out when and on which ship Jabba's assassin is being transported. Once her hired guns have found the information and handed it in to her, she will send them to the Corvette.
Neutral (Criminal) Assassin Mission
A Rebel commander with the Alliance has a gambling problem and has repeatedly failed to pay off his debts to Jabba. Jabba, not happy with the situation, has placed a bounty on the man's head. He thinks he's safe because as a Rebel he maintains a low profile anyway, but it won't help him this time. Bronell, the Mon Cal, has decided that he will collect the bounty on this Rebel commander, but first he needs to find a group of hired guns who can actually do the task for him, since he's something of a coward. He is smart though, and knows a few things about the Rebel in question, so he should be able to help his agents find him if they follow his instructions. Bronell knows, for example, that Jabba isn't the only person the Rebel owes money too. He's found out through various underground sources that a group of pirates also took some bets for him, but unlike Jabba's unimaginative underlings, these pirates actually kept up with where the Rebel went. They don't want him dead just yet (he doesn't owe them as much as he owes Jabba) and they don't want Jabba killing him either (how will he pay them when he's dead?) so they're keeping the information for themselves.
Neutral (Criminal) Destroy Mission
One of Jabba's minions has betrayed him, spilling valuable information in order to lessen his sentence. This information is currently stored on a hard disk and is on a CorSec transport on its way to a council of Galactic Judges. Jabba can't possibly let that ship make it to its destination. It's the player's job to make sure it doesn't. Jabba will pay handsomely for the destruction of that ship, but before anyone can even get to it, there will be some work involved. Jabba knows the ship in question, and knows that he needs destruct sequences to destroy it. He has some ideas where he can get that information.


Good Luck!